Europe Travel Map — Button-Triggered Photo Viewer
What is it?
"note" style="margin:0 0 0.5rem;"> A tactile A0 wall map that plays photo slideshows for each country you visited when a physical button is pressed.
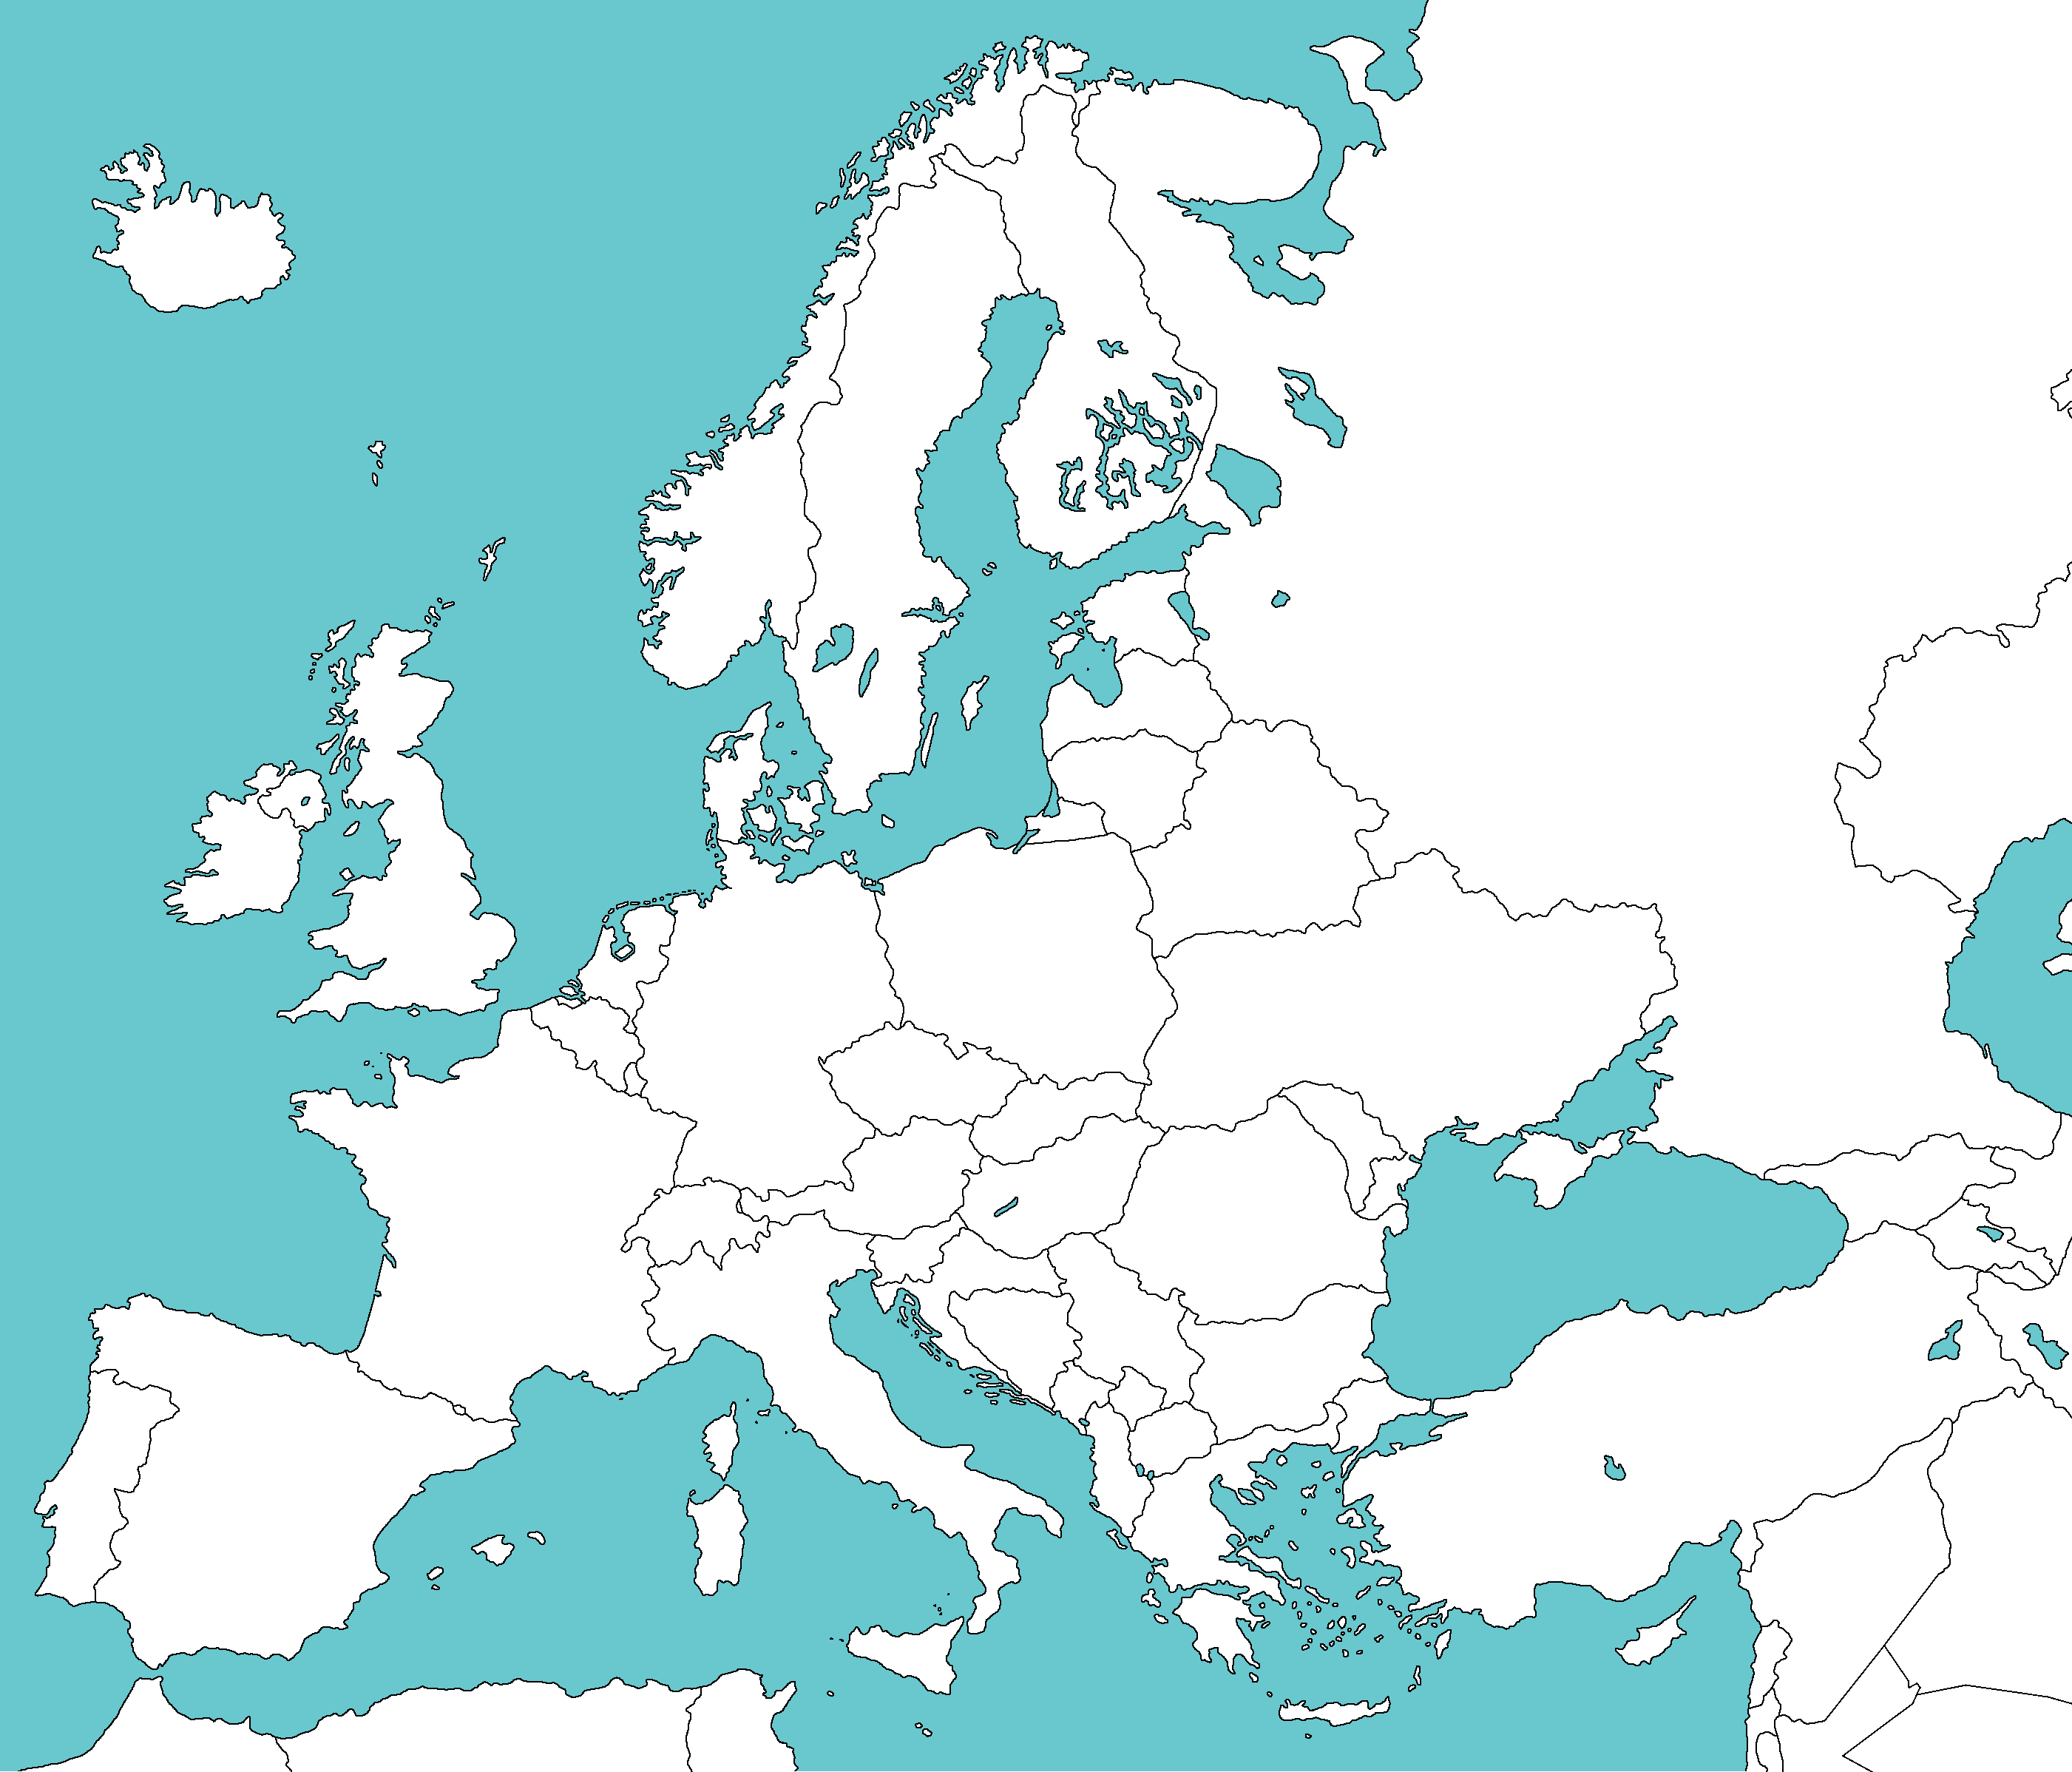
I built this for my parents, who have a knack for picking a new corner of Europe every chance they get. The idea is simple: an A0 wall map with a small screen in the top-right, and a push-button for each country they’ve visited. Tap a button, and a loop of photos from that country comes alive on the display—about one image every couple of seconds. It is a gift for everybody, even though the project itself doesn't look professional, my parents loved it.
I wanted it to feel like a keepsake, not a gadget. Under the surface it’s an ESP32 with an I²C expander quietly listening for button presses, and a TFT panel streaming JPEGs off a microSD card over SPI. In practice, it feels like a tiny time machine: every button is a door to a trip we loved talking about!
Europe Travel Map Tutorial
Build your own tactile photo map that brings travel memories to life with the press of a button.
Introduction
Hey there! Ever wished you could turn a wall map into a magical time machine? That's exactly what this project is—a tactile A0 Europe map that brings your travel memories to life with the press of a button. This setup lets you tap a country and watch a curated slideshow of photos from that trip play on a small screen.
What makes it cool? It's simple hardware magic: an ESP32 microcontroller listens for button presses, pulls photos from a microSD card, and displays them on a TFT screen. No internet, no apps—just pure, physical nostalgia. If you're into hardware, travel, or just building things that feel personal, this one's for you. It's beginner-friendly too—basic soldering and coding skills get you there, and I'll walk you through every step.
Let's build one!
What You’ll Need
Materials
- A0 Europe map printout (or any large map you like)
- Backing board (I used cardboard but foam core or wood will work)
- 12mm momentary push buttons (one per country—start with 10-15)
- Jumper wires
Components
- ESP32 dev board or Arduino (with USB for programming)
- MCP23017 I²C I/O expander (I needed to use it to connect more countries)
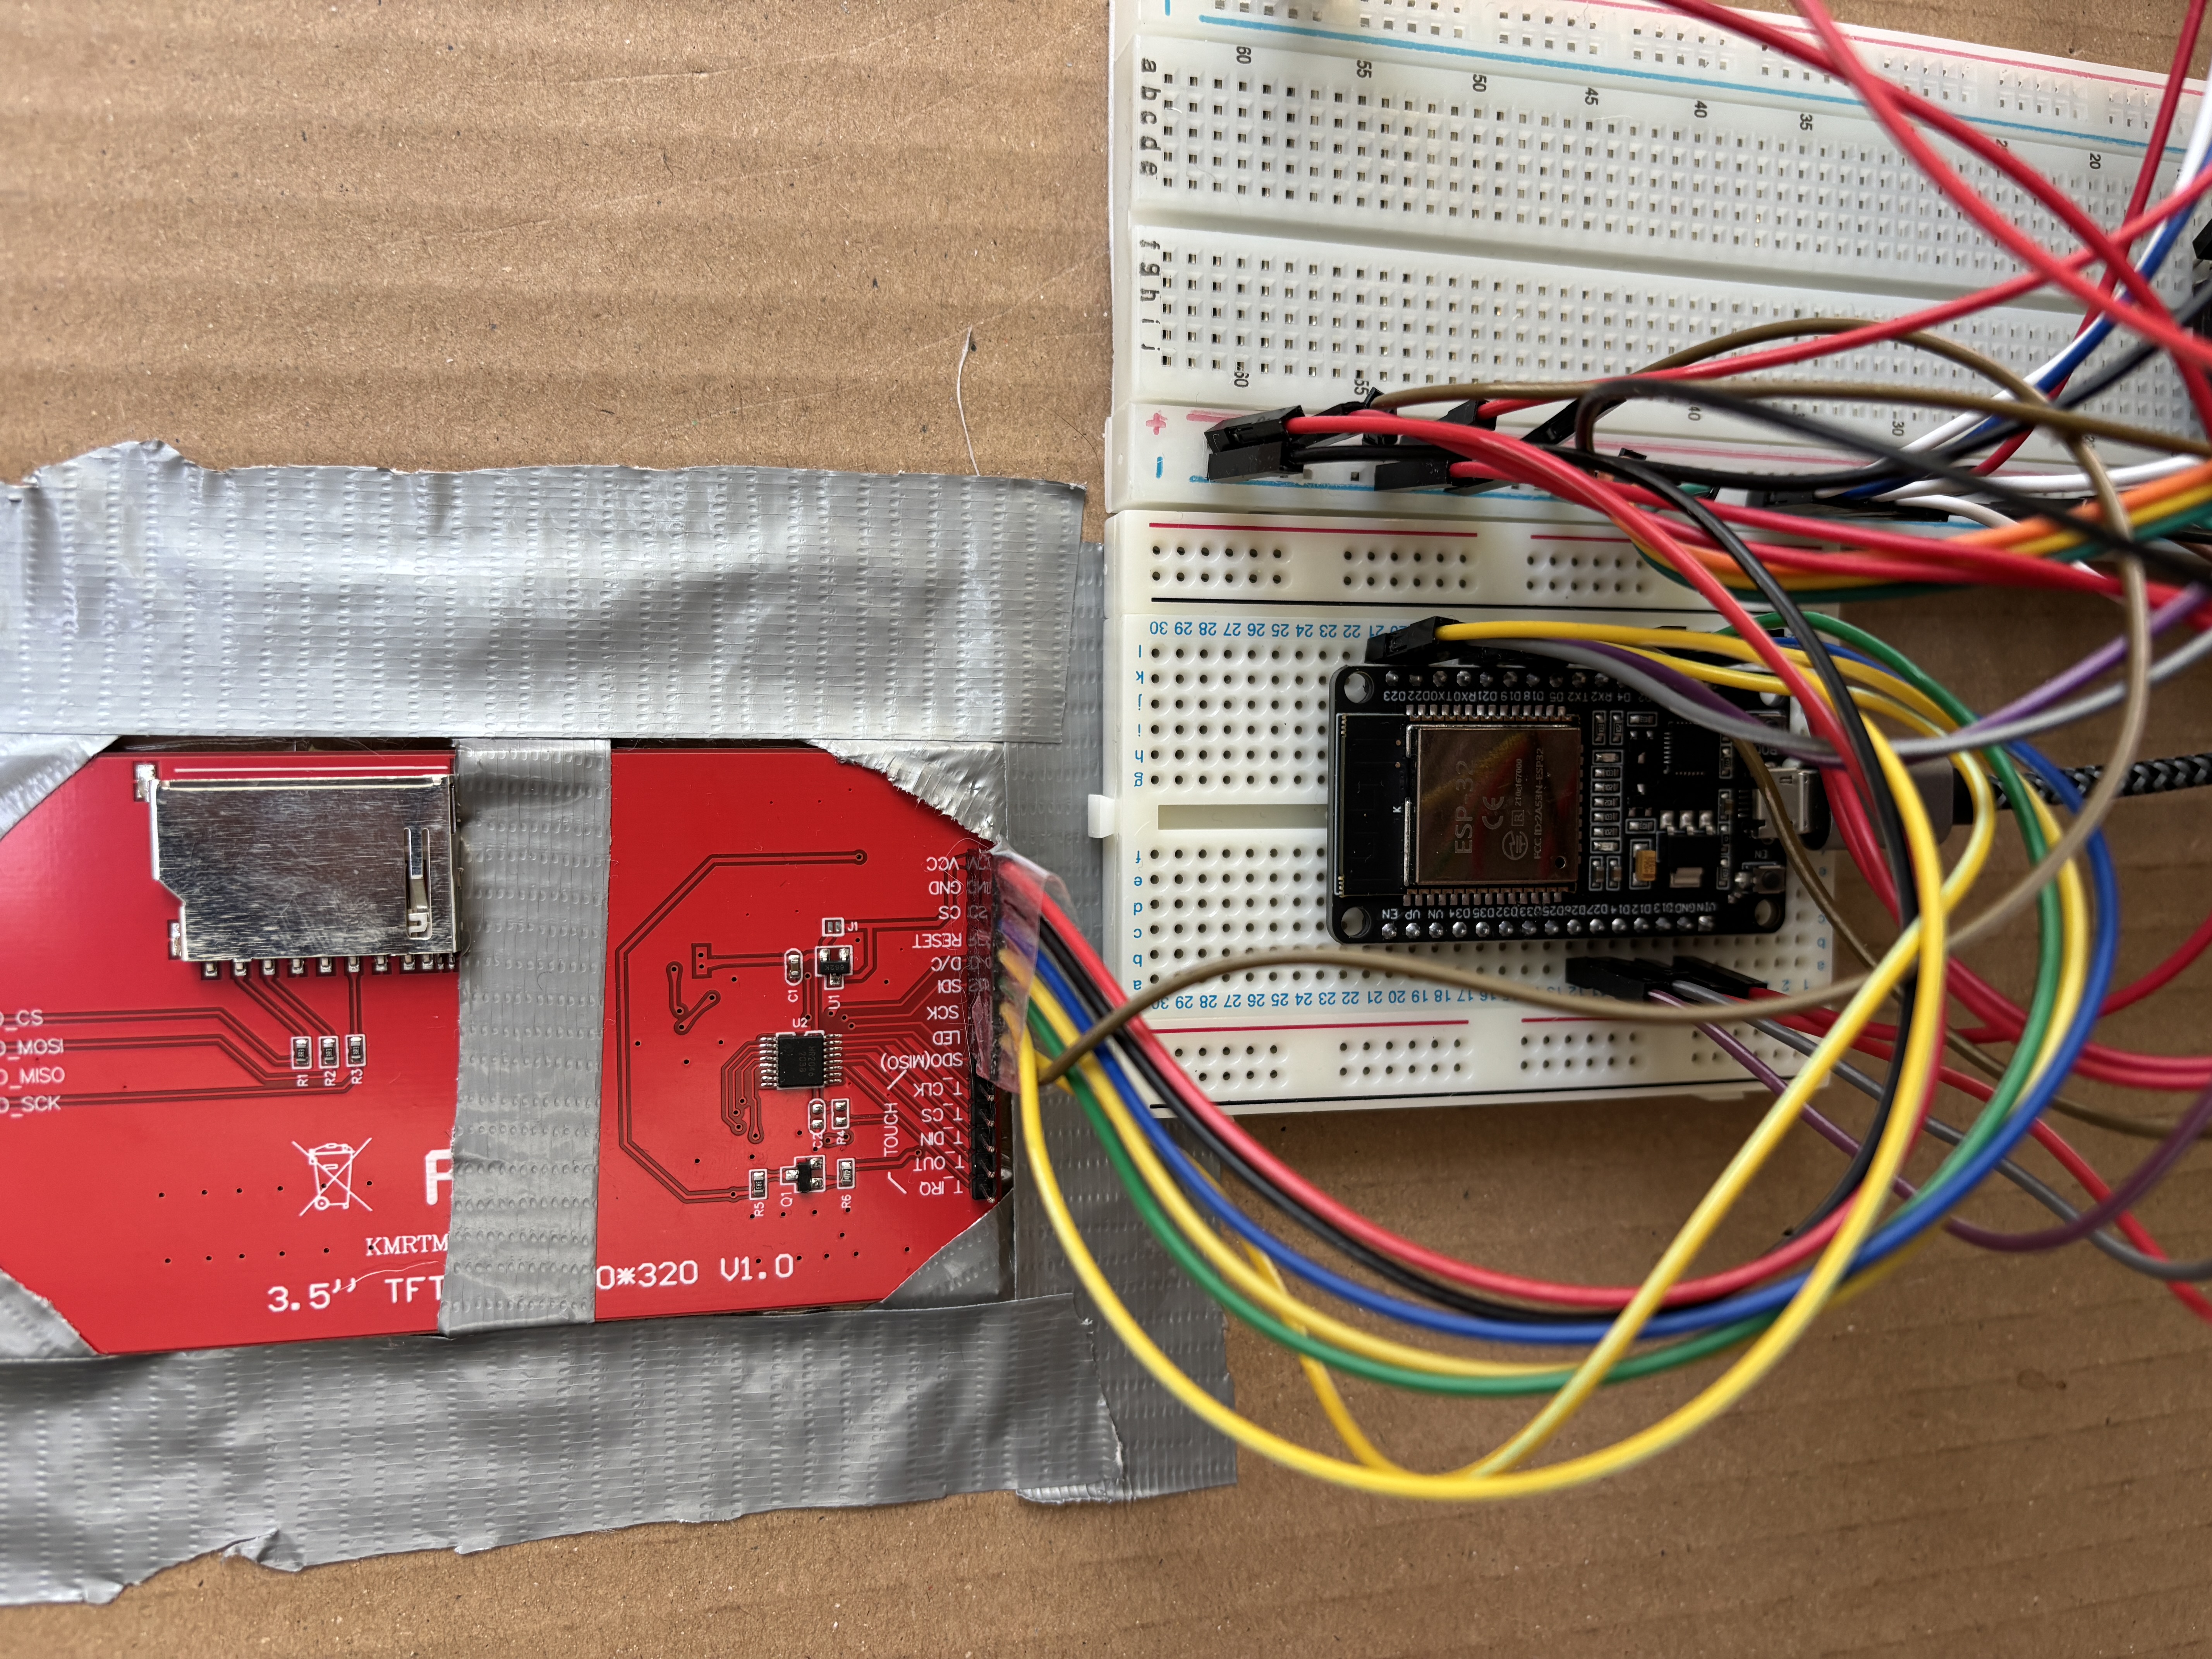
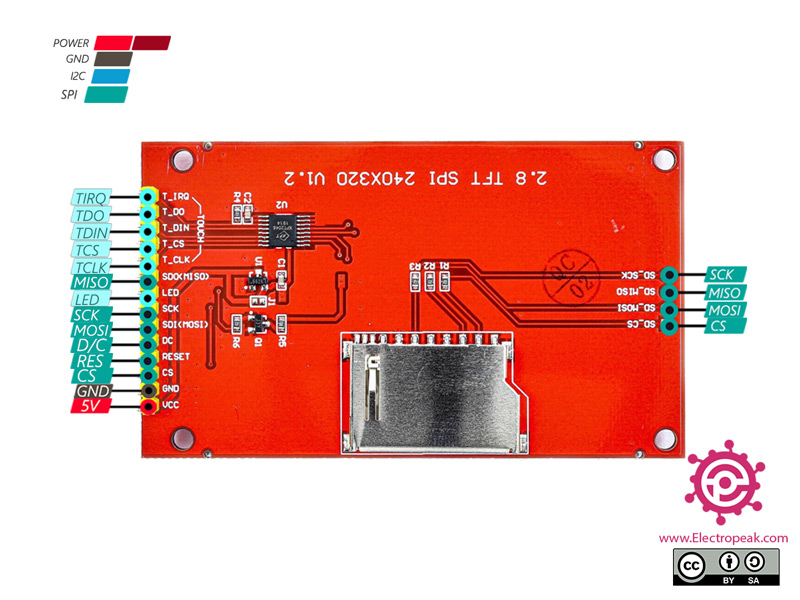
- 3.5" SPI TFT display (ILI9488 driver, 320x480 resolution)
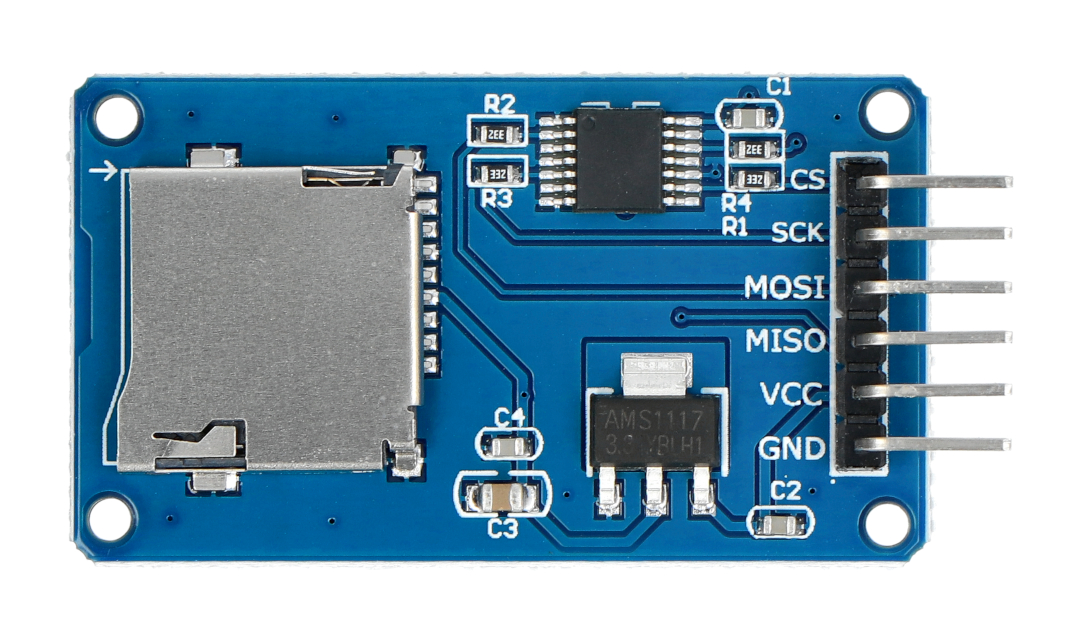
- MicroSD card module (3.3V compatible)
- MicroSD card (FAT32 formatted, 8GB+)
- Power supply (USB for ESP32, don't use a battery because it'll quickly drain)
Tools
- Drill (for button holes if using wood - for cardboard a pen works)
- Soldering iron
- Wire cutters/strippers
- Multimeter (optional; for testing connections)
- Computer with Arduino IDE (for programming)
Step-by-Step Instructions
Alright, let's dive in. I'll guide you through this like we're building it together in the workshop—starting with gathering parts and ending with that first magical button press.
Step 1: Gather Your Parts and Plan the Layout
First things first, source your components. I ordered everything from TinyTronics but any electronics store will do. For the map, print an A0 Europe poster—plenty of free high-res versions online. Mount it to your backing board with spray adhesive/glue; foam core works great for quick builds, but wood gives it that premium feel.
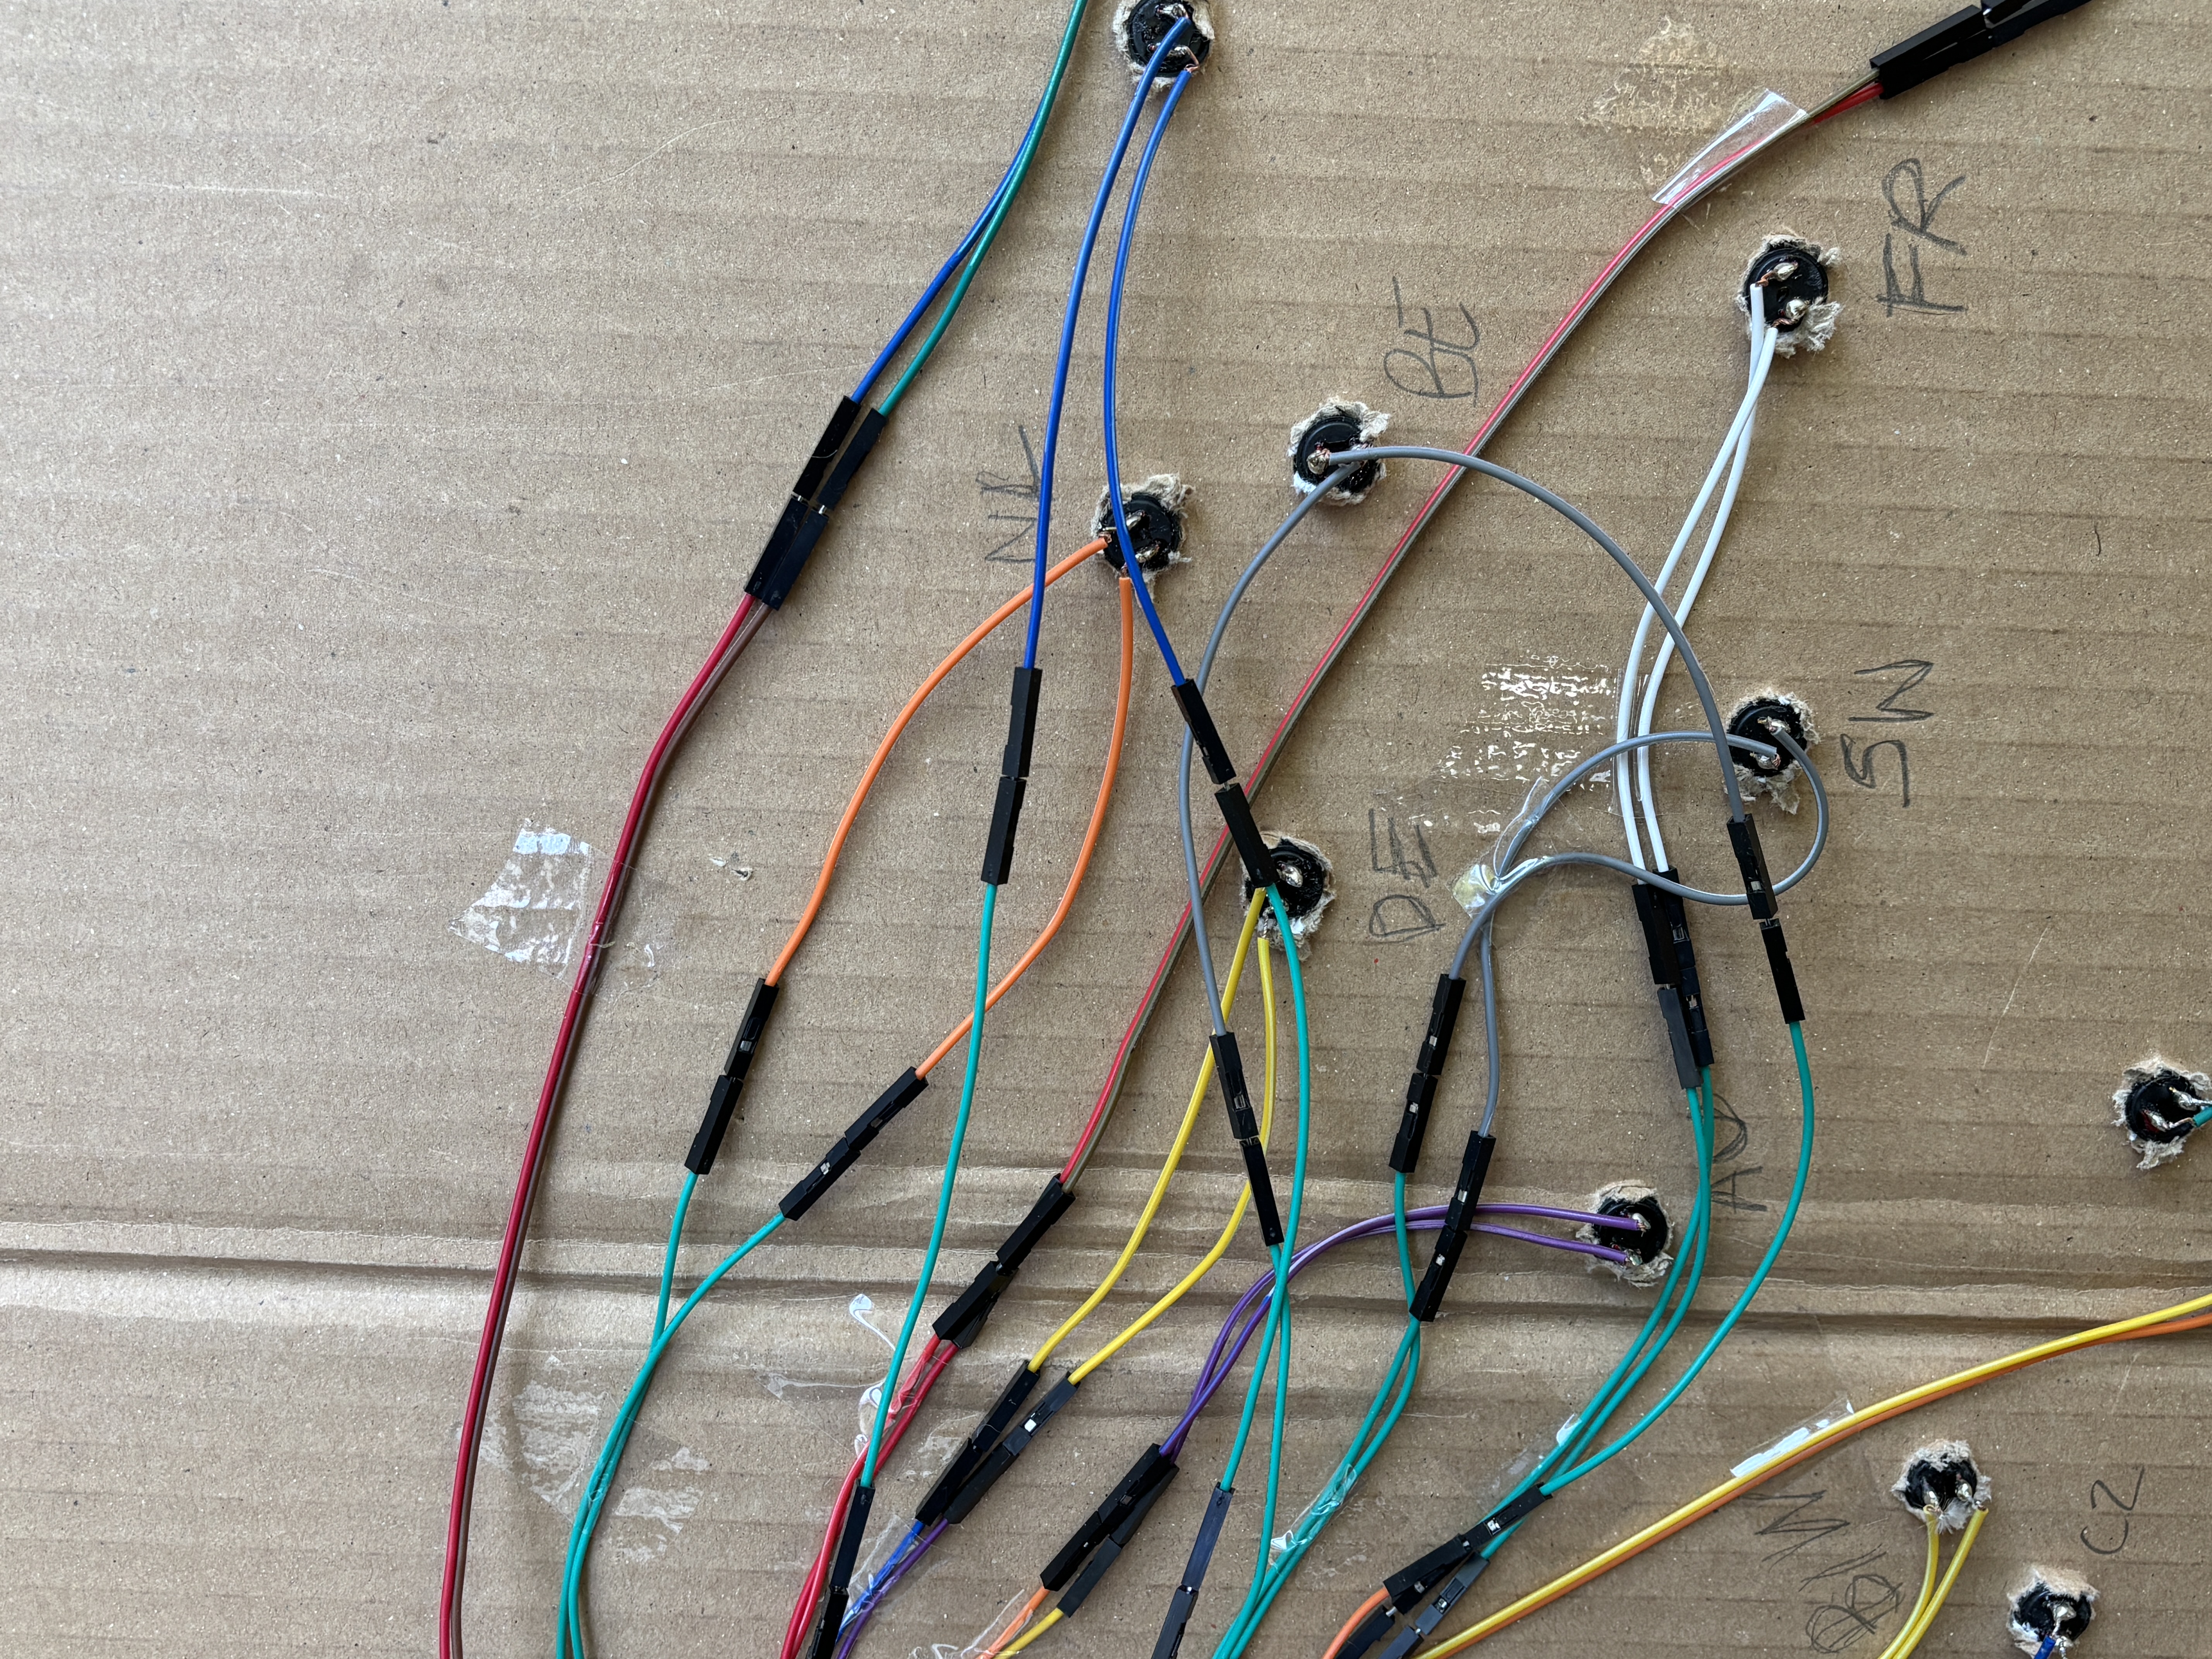
Now, sketch your button placement. Mark country centers—capitals or iconic spots. Space them out so buttons don't overlap. Drill holes just big enough for your buttons (12mm diameter is perfect). Pro tip: sand the edges smooth so everything sits flush. For the cardboard version I drilled holes with a pen.
Mount the TFT screen in the top-right corner. I cut out a hole in the backing board that is slightly smaller than the screen, taped the corner edges and pushed the screen in. It was somewhat stable, so then I taped it in the back too.
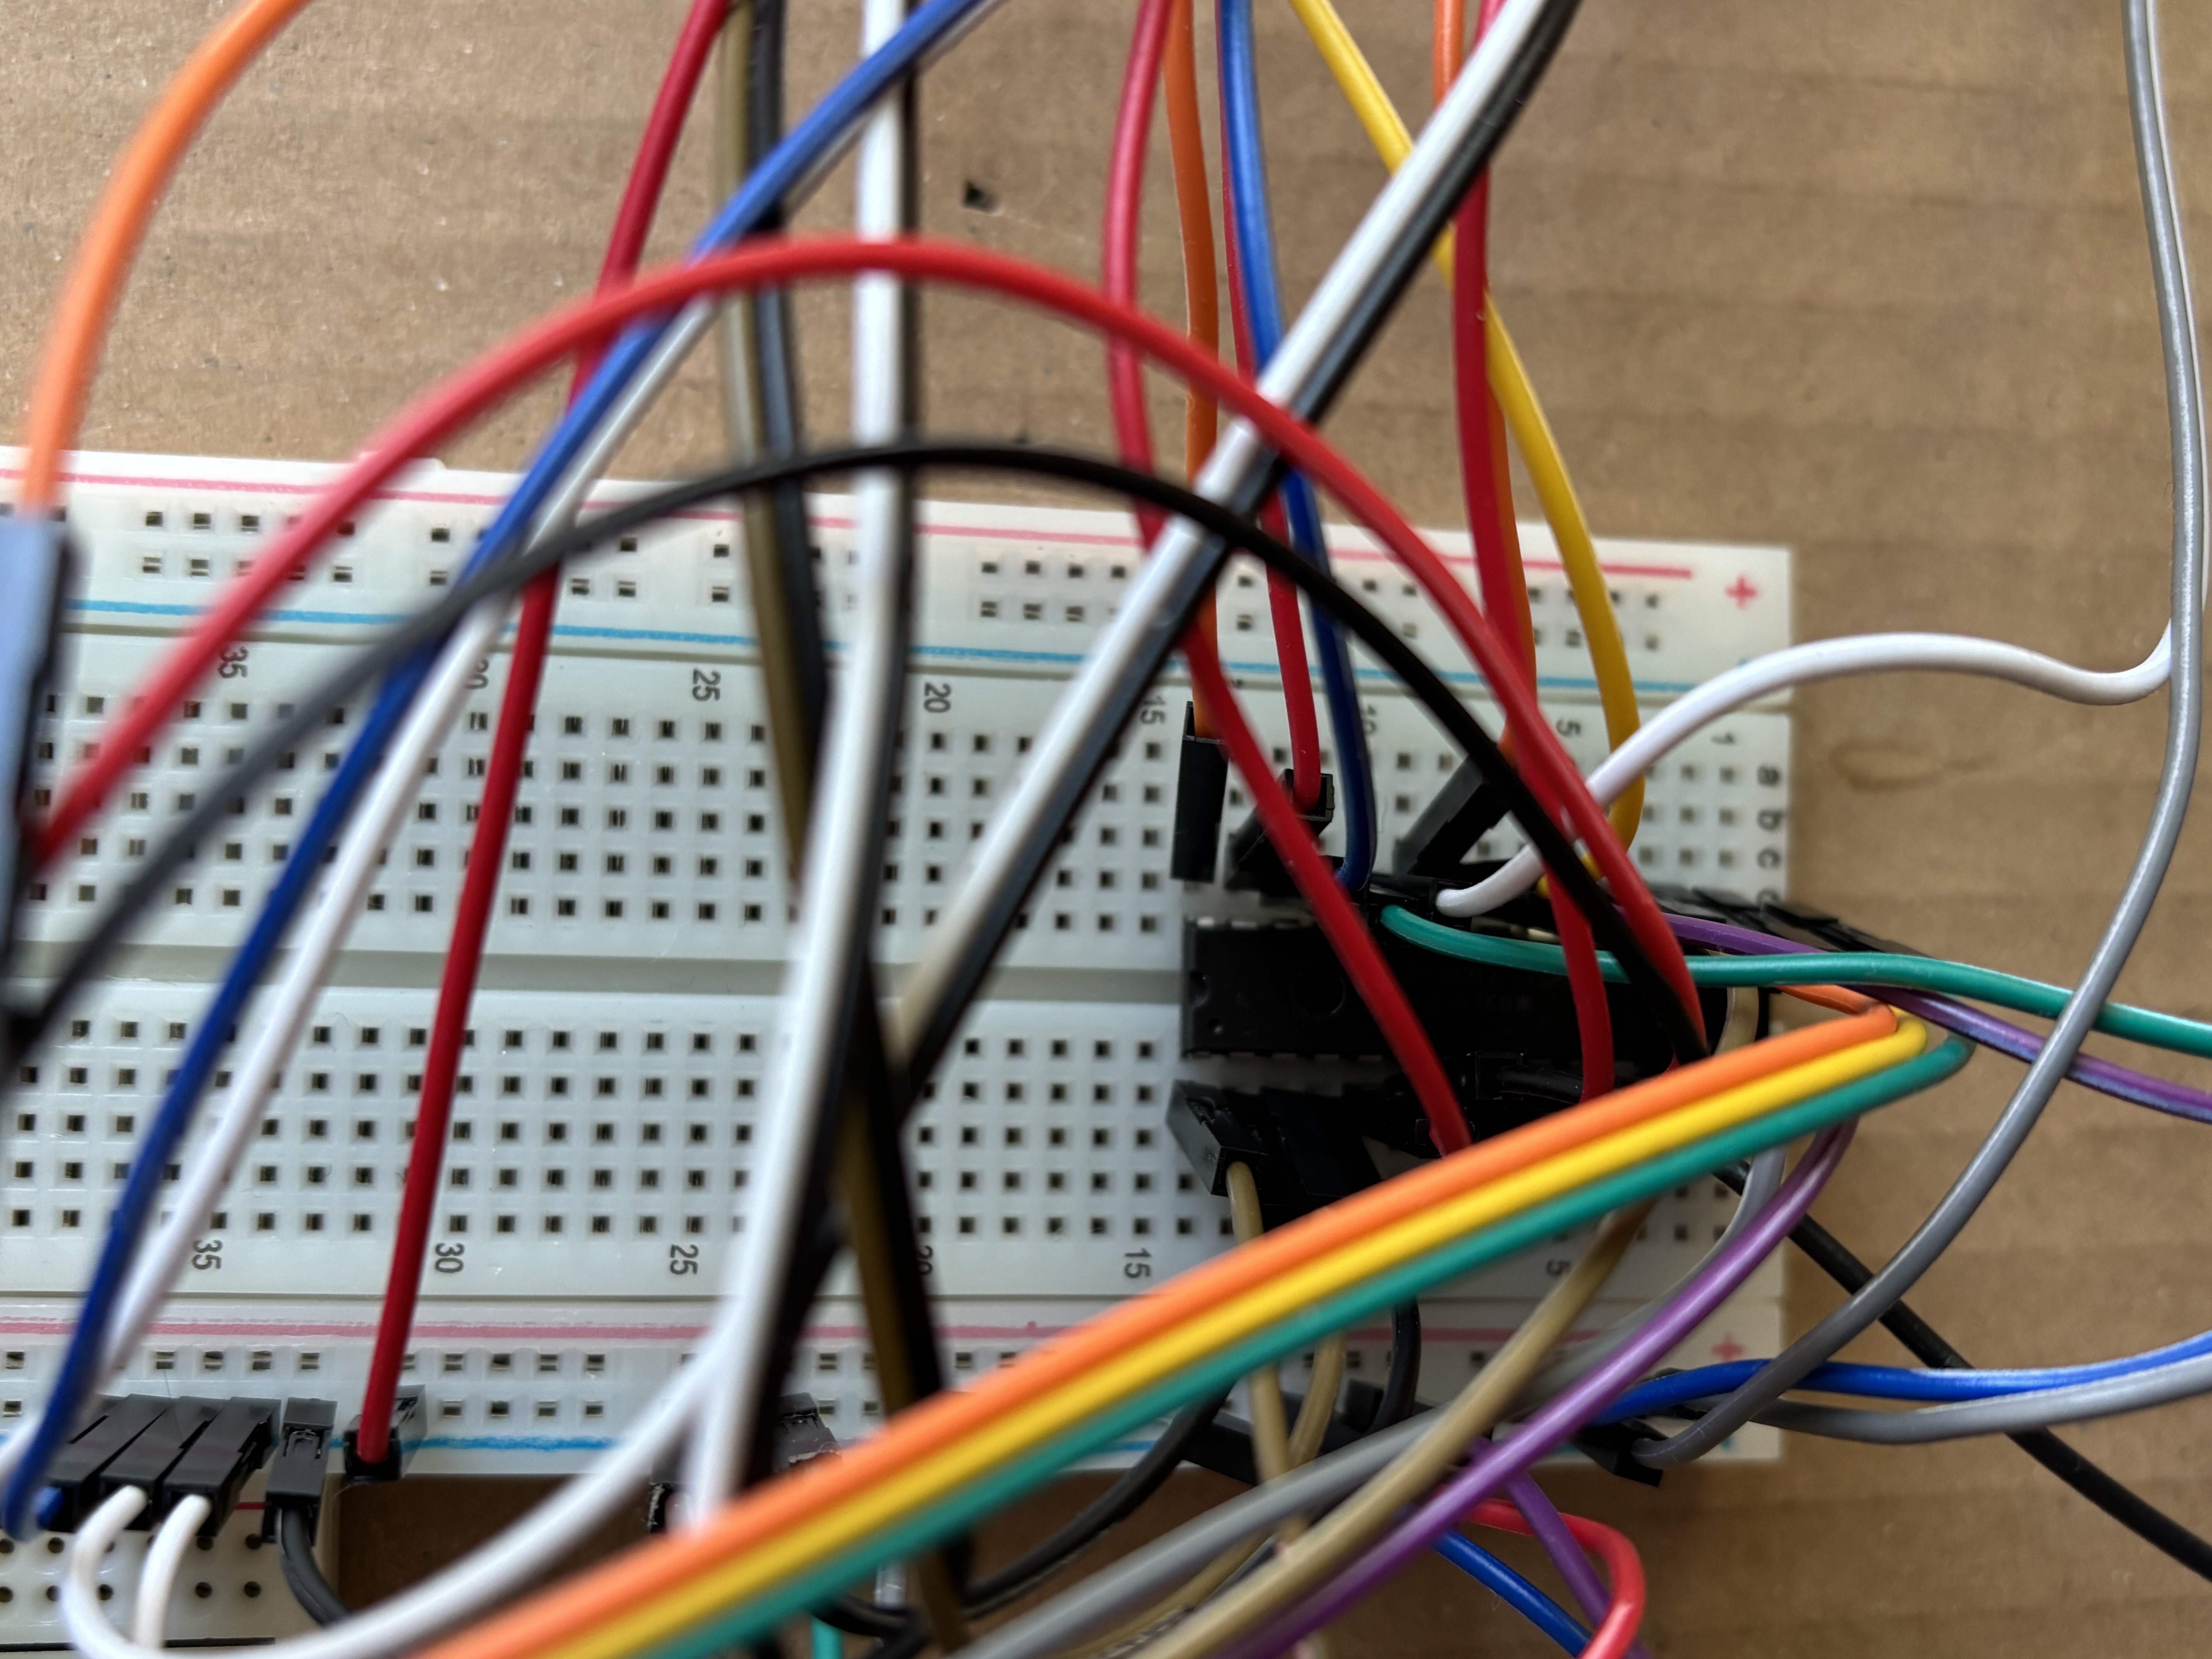
Step 2: Wiring It All Up
We'll use I²C for the buttons (via the MCP23017) and SPI for the screen and SD card. Keep it tidy—label your wires as you go.
Connect the MCP23017 to the ESP32:
| Pin / Signal | Connects to | Notes |
|---|---|---|
| SCL | GPIO 22 | I²C clock |
| SDA | GPIO 21 | I²C data |
| VDD | 3.3 V | Power |
| GND | GND | Ground |
| RESET | 3.3 V | Keep high (inactive) |
| A0–A2 | GND | I²C address 0x20 |
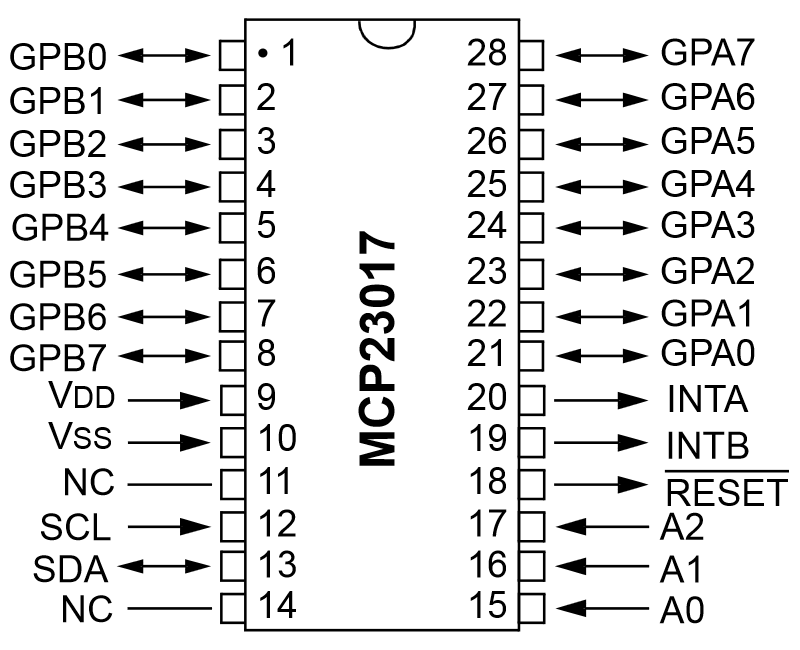
Each button connects to one MCP23017 pin (GP0–GP15) and shares a common ground. Internal pull-ups are enabled in code.
| Pin / Signal | Connects to | Notes |
|---|---|---|
| MOSI | GPIO 23 | SPI data |
| SCK | GPIO 18 | SPI clock |
| CS | GPIO 15 | Chip select |
| DC | GPIO 2 | Data/command select |
| RST | GPIO 4 | Reset |
| VCC | 3.3 V | Power |
| GND | GND | Ground |
| MISO | — | Unused |
| Pin / Signal | Connects to | Notes |
|---|---|---|
| MOSI | GPIO 13 | SPI data |
| MISO | GPIO 27 | SPI read |
| SCK | GPIO 14 | SPI clock |
| CS | GPIO 5 | Chip select |
| VCC | 3.3 V | Power |
| GND | GND | Ground |
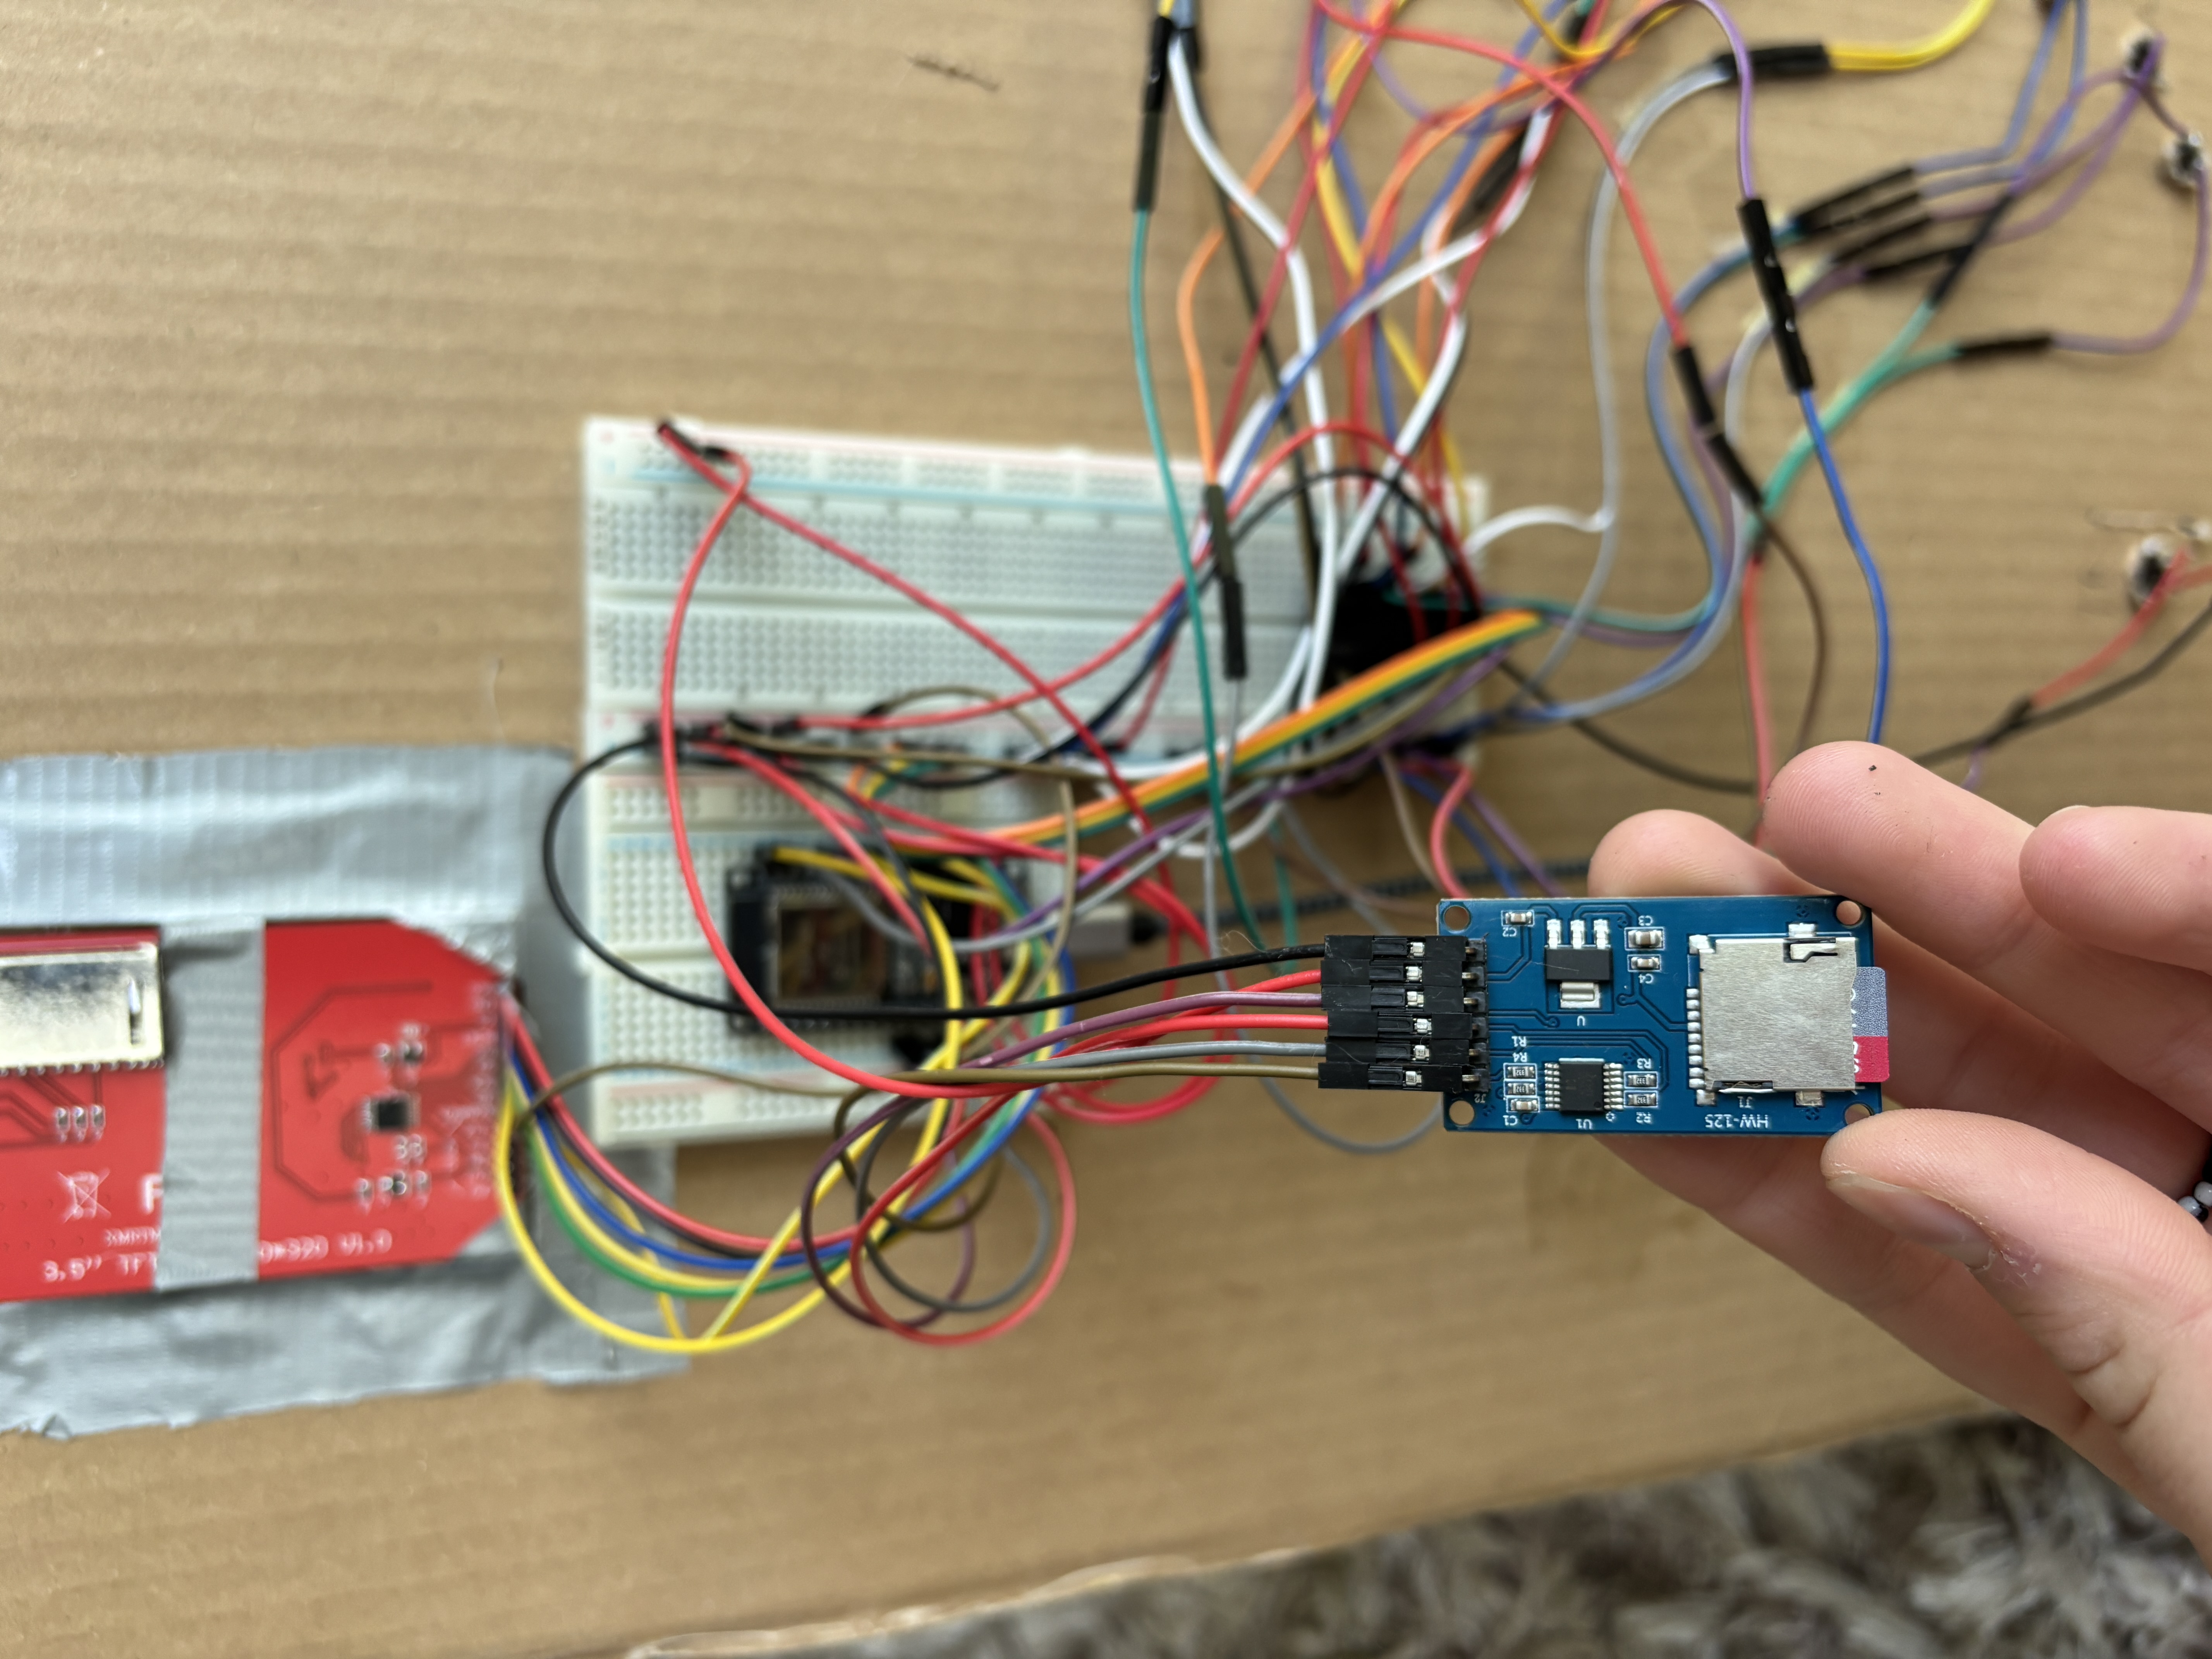
Double-check connections with your multimeter. Once wired, tuck everything behind the map. It should look clean, like the tech is just part of the art. I used jumper wires for easy adjustments but soldered connections would be more reliable for long-term use.
Step 3: Assembly and Mounting
With wiring done, assemble the physical map. Snap buttons into their holes—they should feel solid but easy to press. Secure the TFT - a dab of hot glue keeps it stable.
Test-fit everything: power on, and make sure no wires are pinched.
Step 4: Programming the ESP32
Time to bring everything to life! Open the Arduino IDE (with ESP32 board support installed) and make sure you have these libraries:
Adafruit_MCP23X17– handles the I/O expanderTJpgDec– decodes JPEG imagesSD_MMC– accesses the microSD card
📦 All code is available here:
github.com/Oribia11/Europe_map
Main Sketch: photo_loop.ino
Core program that runs the display loop and logic.
Optional Test: test_display.ino
Verifies TFT screen and SD card wiring before running the full project.
Image Converter: photoConvert.py
Python helper that resizes and converts images to JPEG for the SD card.
Run this before uploading photos to ensure they display correctly.
Once everything is set up, connect your ESP32 via USB and upload the sketch. If it compiles without errors — you’re golden ✨
Step 5: Testing and Calibration
Power it up and test one button at a time. Press a button—does the slideshow start? Check for common issues:
- Blank screen? Verify TFT pins and power.
- No SD access? Ensure FAT32 format and correct HSPI pins.
- Buttons not responding? Confirm MCP address and pull-ups.
Once one works, add photos to the SD card in folders like `/italy/01.jpg`, `/france/01.jpg`.
Final Thoughts
Your Europe Map is now a living memory bank! Press a button, and watch photos loop—each one a portal to a trip. It works offline, powered by USB or batteries, and feels delightfully analog in a digital world.
What could be improved? Add a "pause" button, integrate WiFi for remote photo updates, or expand to more continents. If you're scaling up, chain MCP23017s for extra buttons.
This project is all about personalization—make it yours. Whether you're gifting it to travelers or building for yourself, it's a reminder that tech can be warm and human. If you build one, share your twists in the issues or pull requests. Happy mapping!